 Contents
Previous
Next
After you have got
the url of the ISPConfig system and your login data from your
administrator you can login. Please go to the URL of your ISPConfig
system (e.g. https://www.domain.tld:81 ; replace "www.domain.tld"
appropriately) with your Browser and enter your user name and your
password into the form "Login". Confirm by clicking on "Login".

- Forgot your
password? If you forgot your password please ask the ISPConfig
administrator to help you.
The interface for
resellers consists of the following sections:

- Menubar
with the menus "ISP Manager", "Web-FTP", "Tools", "Help" and "Logout".
- Buttons:
Directly beneath the menubar you can find the buttons "New client",
"New site", "New folder" and "Search".
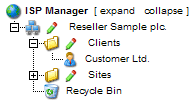
- Structure Tree:
The structure tree is the storage system of the ISPConfig system. It
manages all the sites and customers. By clicking on "expand" (next to
"ISP Manager") all folders are opened. By clicking on "collapse" the
tree is closed. Sites can be assigned to customers (folder "Clients")
but do not have to be. Then you can find the sites in the customer
independent folder "Sites".
The privileges of a
reseller in ISPConfig include those of a customer:
- Create and
administrate customers, read their statistics
- Create and
administrate webs
- Create DNS entries
- Read a web's basic
data and statistics
- Create and
administrate users and email boxes
- Create and
administrate (sub)domains
- Apply for SSL
certificates (optional)
- Administrate MySQL
access data
- Change the
settings of his mailbox (password, spamfilter and antivirus settings)
|
|
|
|
|
|
The ISPConfig system
offers you two possibilities to save data you enter into a form:
- "Save"-Button:
Click onto the "Save"-button to save your entries. The information will
be submitted, and the structure tree as well as the start page will be
reloaded in your browser.

- Change the tab:
If a form consists of more than one tab you can simply change the tab
to save your data. The data of the old tab will be saved, and the new
tab will be loaded, whereas the structure tree will not be reloaded.
This technique of saving data allows you to process forms with more
than one tab in one pass and is one of the main characteristics of
ISPConfig.

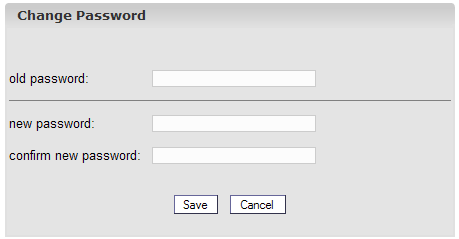
You can edit your
ISPConfig password under
"Tools" -> "Change Password".

Please enter your
current and your new password (2x) into the form "Change Password" and
click on "Save".
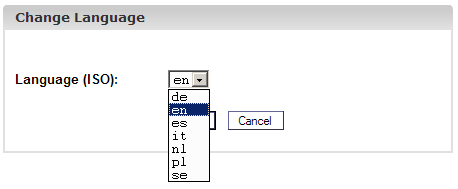
You can set the
language of your ISPConfig system under "Tools" -> "Change Language"
.

In the form "Change
Language" select the language the system should use for you and click
on "Save".
Please note:
The language setting only affects your own account. Other users of the
ISPConfig system (other resellers or customers) can select their
language individually.
Passwords that you
entered in the ISPConfig system (e.g. reseller or customer passwords
for accessing the ISPConfig system; passwords for customers' MySQL
databases) will not be displayed in the ISPConfig system for
security reasons after they were saved! Thus, an empty password field
in an ISPConfig form does not mean that no password was entered before.
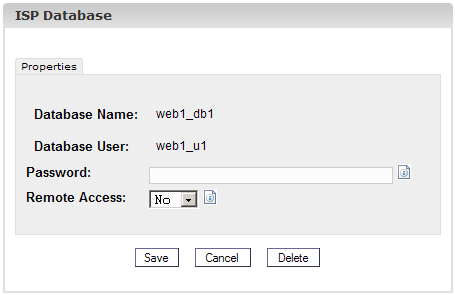
An existing
password does not get displayed after the reload of the respective
form.
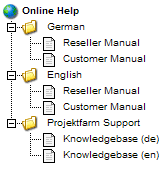
Click onto the menu
item "Help".

Here you will find
the reseller- and customer-manual in English and German in PDF format
as well as links to the
knowledgebase on the Projektfarm website.
In addition to that
you can find a question mark next to many input fields in the ISPConfig
system:

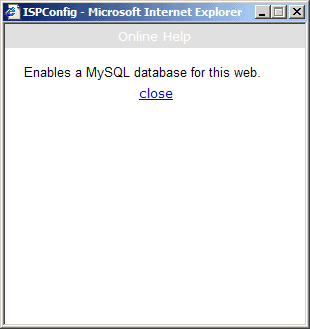
If you click on the
question mark a small pop-up window with context-sensitive help will
open.
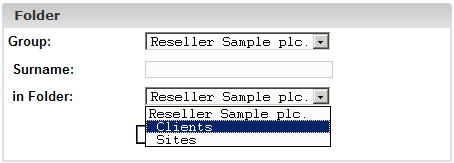
Customer management
is done via the structure tree. The default folder is the folder
�Clients�. There you can save customers but you may also create new
subfolders (e.g. �Customers A-K�, �Customers L-Z�) (see chapter
II-4.1.1).

A customer can be
added as follows:
1. Step: Open the
form "ISP Reseller".
Click on the button
"New Client".

The form "ISP
Client" with the opened tab "Master Data" appears.
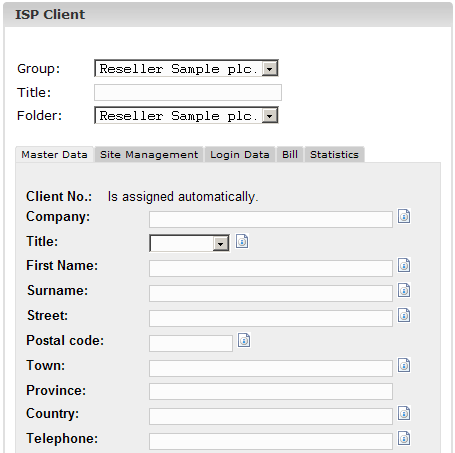
2. Step: Assign
title, folder and master data
- Title: This is the title for the
customer in the structure tree.
- Folder:
Select the folder "Customers". Alternatively you can create your own
folders for customers. These folders will appear in the drop down menu.
The creation of folders is described in chapter II-4.1.1.
- Master Data:
Enter the master data of your customer. Some of the fields are
optional.
- Save Customers:
By clicking on "Save" the customer is saved and appears in the
structure tree under the title you provided. Click on the newly created
customer to carry out further tasks. OR: By clicking on the button
"Limits" you can go directly to the next step. The master data is
saved, but the structure tree does not get updated yet. The update
happens when you click on "Save" or on "ISP Manager" in the menubar.
3. Step: Add /
Manage Sites
Under the tab "Site
Management" a customer's sites can be controlled. You can also add new
sites. Sites can also be added subsequently.
4. Step: Assign
Access Data
Go to the tab "Enter
information ".
- User Name:
Acustomer's username should be unique.
- Password:
Enter the customer's password for logging in to the ISPConfig system.
As soon as you click on "Save" the password becomes invisible in the
password field. If a customer forgets his password you can reset it
here.
5. Step: Enter
Billing Information (Optional)
O
n the tab "Bill" you can enter the information required for billing
(address, invoice amount, billing intervals, payment arrangements).
This information is optional.
6. Step: Save
Click on "Save".
In the structure
tree of the ISP Manager open the folder "Clients" and click on the
customer you want to edit. Make the desired changes in the form "ISP
Client" and click on "Save".
- Change Title:
In some cases it might be necessary to change the title of a customer,
e.g. if a second customer with the same name (such as Miller) has
registered.
- Change a
Customer's Master Data:
If the address, telephone number etc. of a customer change, you can
update the customer in the tab "Master Data" and click on "Save".
- Change
Password: A
new password can be set simply by filling out the field "Password".
- Billing
Information:
Click on the section "Billing Information" to edit a customer's
information.
- Add / Edit
Sites: See
chapter II-3.
- Delete a
Customer:
Open the customer's form and click on "Delete".
Please note: A customer can only be deleted if no sites are
assigned to him.
Site management can
be handled in two ways: customer dependent and customer independent.
- Customer
dependent Site Management: The tab "Site Management" in the
customer's form lists a customer's sites . By clicking on "New" you can
add new sites for the customer (see chapter II-3.1). By clicking on the
IP address of a site you can see the site's details and make changes if
necessary.
- Customer
independent Site Management:
In the folder "Sites" you can find customer independent sites. This
assignment is done in the form header of the respective site in the
field "Folder". The customer independent management of sites allows
sites to be ordered by criteria such as the size of a site.
A site is added as
follows:
1. Step: Open the
form "ISP Sites".
In the structure
tree of the menu "ISP Manager" click on the customer to whom you want
to assign the site. (If you want to add a site for a new customer,
please add the customer first as described in chapter II-2.1.)
The form "ISP
Client" shows up. Click on the tab "Site Management".
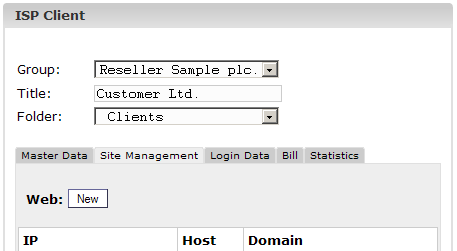
Click on the button "New".
If you have created
hostingplans before (over the button "Hostingplan"), then select the
appropriate hostingplan for the new site now, otherwise select
"Individual Settings".
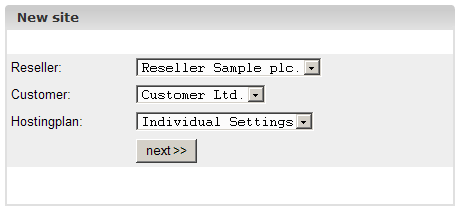
The form "ISP Site" appears.
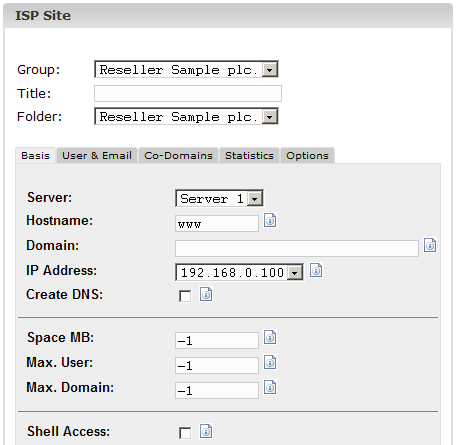
2. Step: Assign
title, folder and basic information.
- Title: This is the title under
which the site will appear in the structure tree.
- Folder: Select the folder "Sites".
Alternatively you have the possibility to create a new folder for the
sites which you then can select here. Learn how to create folders in
chapter II-4.1.1.
- Server: Select the server that will
host the site.
- Hostname:
Enter the hostname (e.g. www).
- Domain: Enter the domain of the site
(e.g. mydomain.com).
- IP Address:
Enter the IP
address of the site.
- Create DNS:
Click on "Create DNS" to create a DNS entry for the current site. After
you have provided the other information for the site and have clicked
on "Save" the DNS entry is created and can be edited by the
administrator if necessary.
3. Step: Limit
webspace, users and domains.
- Space MB: Enter the amount of MB that
should be available to the site ("-1" means "Unlimited").
- Max. User:
Enter the maximum
number of users with email boxes that can be assigned to the site ("-1"
means "Unlimited").
- Max. Domains:
Enter the maximum number of co-domains that can be set up for the site
("-1" means "Unlimited").
4. Step: Activate
site features.
- Shell Access:
Allows the
customer to use the linux shell. This is a security risk and should
therefore only be granted in exceptional cases. Shell access
includes FTP access.
- CGI Scripts:
Allows the web
server to execute cgi scripts in a certain directory (cgi-bin).
- PHP Scripts:
Allows the web
server to execute PHP scripts (file extensions .php, .php3, .php4).
- SSI: Activates Server Side
Includes (SSI) (file extension .shtml).
- FTP Access:
Allows the users
assigned to a site to access the site or the users' directories via
ftp.
- MySQL: Enables the creation of a
database which is assigned to the site. If you supply a user name and
password for the MySQL database in the tab "Other" the database will be
created automatically.
- SSL Certificate:
Enables the creation of an SSL certificate for the site. You still have
to fill out the section "SSL" and select "Create Certificate" in that
section to create the certificate. Learn more about applying for an SSL
certificate in chapter III-2.4.1. If this field is not activated the
tab "SSL" is not shown!
Please note: There can be only one SSL-capable site per IP
address!
- Anonymous FTP:
Activate this to create an Anonymous-FTP account for this site.
Please note: There can be only one Anonymous-FTP account per
IP address!
- Anon. FTP MB:
Please specify the storage space in MB that should be available for the
Anonymous-FTP account. "-1" means "Unlimited". If "Anonymous FTP" is
not activated this field is ignored.
- Apache
Direktives (Optional):
This field is available to you as a reseller only if the ISPConfig
administrator has activated it for you. It offers you the opportunity
to write additional Apache directives into the site's virtual host
container manually. These directives will undergo a syntax check. If
the syntax check gives back an error the directives will be commented
out automatically so that the Apache web server cannot die.
5. Step: User
administration.
O
n the tab "User & Email " in the form "ISP Site" new users are added /
existing ones are managed.
Learn more on how to
add users in chapter III-2.2.1.
6. Step: Domain
administration.
O
n the tab "Co-Domains" new co-domains are added / existing ones are
managed.
Learn more on how to
add co-domains in chapter III-2.3.1.
7. Step: Save.
Click on "Save".
In order to edit a
site you have to open the corresponding site form first. This can be
done in two ways:
- Customer
dependent: In the structure tree click on the customer whose site
you want to edit. Then click on the folder "Sites" and select the site
you wish to edit.
- Customer
independent: In the structure tree click on the folder "Sites" and
select the site which is to be edited.
The form "ISP Site"
is loaded. Enter your changes and click on "Save".
- Change
Title/Folder: In some cases it might be useful to change the title
of a site and/or to move it to another folder. Simply enter a new title
and/or select the new folder.
- Change Basic
Data: Here
you can change the basic data (host, domain, IP address).
- Change Limits
(Webspace, Users, Domains):
The shown limits can be changed by entering new values. "-1" means
"Unlimited".
- Create DNS
Entry:
Check "Create DNS" and click on "Save".
- Change Access
Data of a Site:
As a reseller you are allowed to change the access information of a
site (customers are not).To do so, go to the section "Access Data" and
enter the username and the password.
- Add/Edit
Co-Domains/Users:
See chapters III-2.2 and III-2.3.
- Extend/Restrict
Site Features:
Features can be activated/deactivated with hindsight. Simply
select/deselect the corresponding checkboxes in the tab "Basis".
- Delete Sites:
Click on the
button "Delete". The site will then be moved to the recycle bin. There
you have two possibilities: restore the site or delete it finally (see
chapter II-4.3).
By clicking on the
button "Hostingplan" you can create hostingplans (e.g. package
"Professional" with 200 MB webspace, CGI, PHP, 3 MySQL databases,
etc.). If you create a new site, you can select one of your previously
defined hostingplans. The form for creating a new site will then show
the properties of the selected hostingplan. If you do not want to use a
hostingplan to create a site you can select "Individual Settings".
The general
management functions aim at sorting and managing customers and sites.
This includes the handling of folders, the search function and the
recycle bin.
The ISPConfig system
allows the creation of new folders to provide a better overview of
customers and sites. This allows you to sort your customers and sites
alphabetically, by size etc.
4.1.1 Adding a New
Folder
Creating a new
folder is done as follows:
Click on the button
"New folder".
Enter a title for
the folder (e.g. "Customers A-K").
In the field
"Folder" select the superior folder for the new folder (i.e. the parent
folder).
Click on "Save".
Now you can see the new folder in the structure tree by opening its
parent folder.
4.1.2 Moving a Site
or Customer to another Folder
This is done as
follows:
In the structure
tree click on the corresponding document (site or customer).
In the field
"Folder" select the new folder.
Click on "Save".
4.1.3 Editing
Folders
This is how to move
a folder:
- Move a Folder:
In the structure tree click on the pen next to the folder you
want to move.

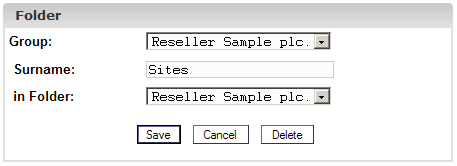
If necessary change the name of the folder. In the field "in Folder"
select the folder where the current folder should move to. Click on
"Save".
- Delete a
Folder: In
the structure tree click on the "B" next to the folder you want
to delete. Then click on "Delete".
Please note: The whole contents of the folder will be
deleted too (i.e. the folder and its contents will be moved to the
recycle bin from where you can restore/delete everything).
You can search for
customers or sites on the basis of specific criteria.
This can be done as
follows:
Click on the button
"Search".

Specify what you are looking for (sites or customers) and click on
"Next" (>>).

- Site Search:
The search criteria for sites are: host, domain, IP address and
webspace.
- Customer
Search: The search criteria for customers are: company, last name,
first name, street, postal code and town.
Enter your search
criteria and click on "Search".
You can edit or
delete each result by clicking on "edit" or "delete".
You can find all
deleted customers, sites, users and domains in the recycle bin.
The recycle bin can
be found at the bottom of the structure tree and can be opened by
clicking on it.
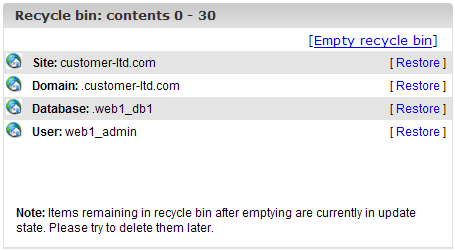
- Empty Recycle
Bin: By clicking on "Empty recycle bin" all documents in the
recycle bin are deleted permanently.
Restore documents:
- Restore
Customers: If you restore a customer all documents related to that
customer (e.g. sites, domains and users) will also be restored.
- Restore Sites:
If you restore a site all documents related to that site (e.g. domains
and users) will be restored, too.
- Restore
Domains: A domain can only be restored if the site to which it is
assigned is not in the recycle bin.
- Restore Users:
See above ("Restore Domains").
Please note
:
Domains and users use different symbols.
The ISPConfig
statistics contain information about the usage of storage space and
about the traffic.
As a reseller you
can find information about the server traffic caused by your customers
by selecting the corresponding customer in the structure tree.
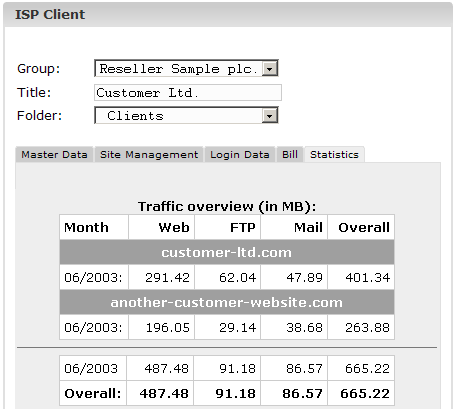
The form "ISP
Client" is loaded. In the tab "Statistics" you can find statistics
about the web-, email- and FTP-traffic of the respective customer.
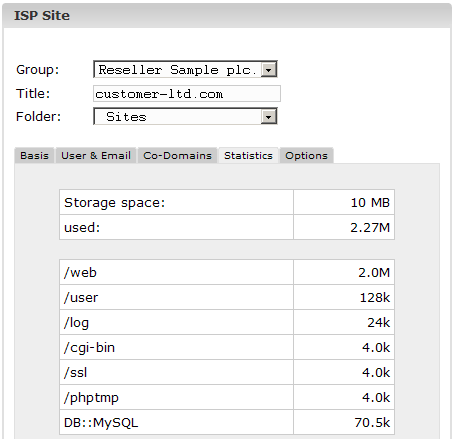
In the form "ISP
Site" you can find statistics about the corresponding site (web
statistics).
The web statistics
contain the following elements:
- Storage Space
and Usage: Information about the total storage space for the site
and the actual usage of the storage space. The storage space limit can
be edited on the tab "Basis".
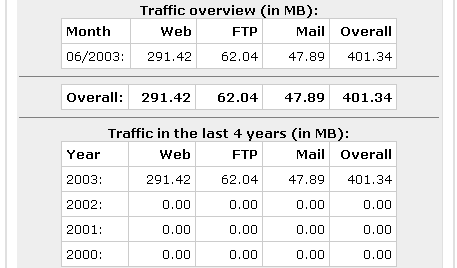
- Traffic: You
can see the traffic of the current month (web, email, FTP) as well as
the traffic of the last four years (if available).
If the statistics
software "Webalizer" is installed on the server, the Apache log files
of the sites on the server are analysed once a night, and new
statistics are created. You can see them in the folder "stats" of the
respective site, e.g. http://www.domain.tld/stats/.
The statistics are
password protected. To login there are the following possibilities:
- If no user has
been created for the site (on the tab "User & Email"), you can login
with the user name "admin" and the password "stats".
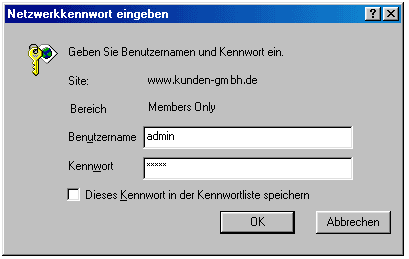
- If users have been
created for the site, you can login with every valid user name/password
combination.
Please note:
If you have created a new site, the Webalizer statistics are not yet
available because Webalizer is run only once a night. After 24 hours at
the latest the first statistics should have been created.
Web-FTP and password
protection of directories are treated in chapter III-4.
Under Tools ->
Welcome Mail you can create salutatory emails for new customers.
Salutatory emails will be sent automatically when a new customer is
created and if the field "email" in the customer's master data contains
a valid email address. This way you can send new customers information
about their new accounts automatically.
Under Tools ->
Standard Index you can specify HTML code for standard index pages with
your own corporate identity, for example. The standard index pages will
be created when a new site is created.
 Contents
Previous
Next

 Contents
Previous
Next


![]()

![]()


 Contents
Previous
Next